How I Take Beautiful STEM Notes on a Samsung Tablet


I’ve been taking notes on a tablet for over 4 years now. I bought a Samsung Tab S7 in my senior year of high-school, and never looked back. Since then, I’ve developed a series of note taking habits that allow me to create organized and visually appealing notes, without much effort. In this article, I'll share the main components of my note-taking system. Hopefully this can give new STEM note-takers a starting point, or inspire some veteran STEM students to improve/switch-up their note-taking system.
Here’s a brief outline of what I’ll cover in this article:
- My preferred notes app & why
- My note-taking system
- The template
- Titles & sectioning
- Bullet point hierarchy
- Color coordination
- Borrowing diagrams
- Example notes
- Class vs. Textbook notes
- How to know what’s important
My Notes App
I got a Samsung tablet instead of an iPad, because I find the Samsung tablets are built more with writing in-mind. The Samsung pen is fabulous, unlike the hard-tip of the Apple pencil, it has a soft tip with a spring mechanism that allows for smoother writing. Furthermore, my tablet came with a fully functioning Samsung keyboard case, which has allowed me to convert my tablet into a decent laptop replacement when traveling.
When I bought my Samsung tablet all of the big note apps, like Notability and Goodnotes, were mainly iOS based. I did some research and settled on the native Samsung notes app.
Here are some reasons I prefer Samsung notes over other note-taking apps:
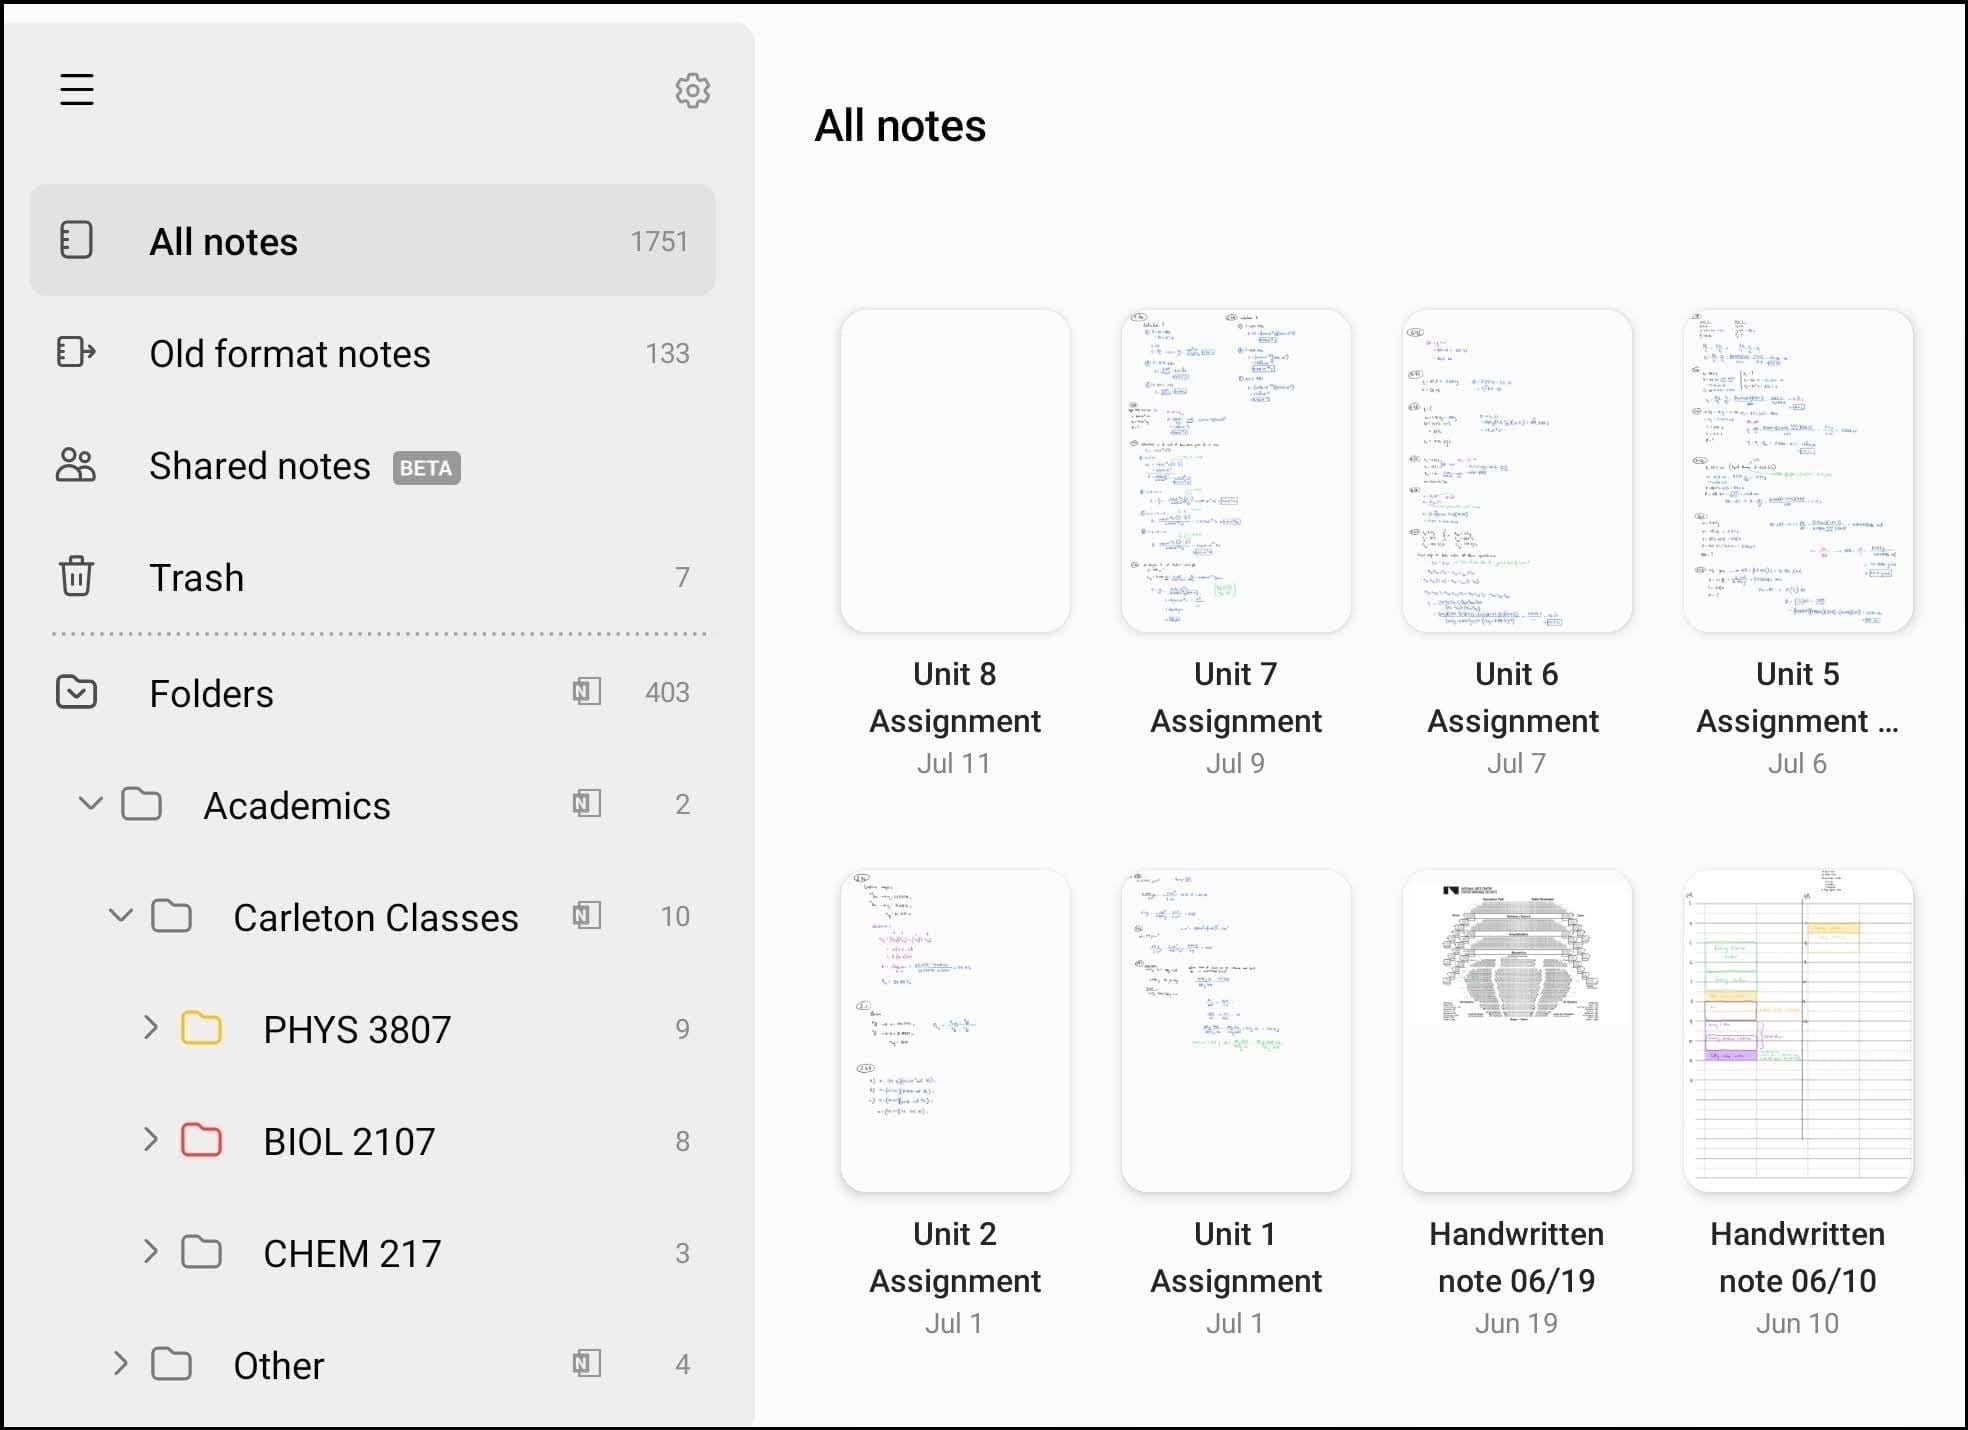
Toggle folder features in the lefthand side-bar
I love toggle features. It’s one of the reasons I love notion (which is where I’m currently writing this article), their toggle features are so convenient and easy to use. Having this built into the folder system of Samsung notes makes my brain melt. The toggle folders can be seen in the sidebar of the screenshot below:
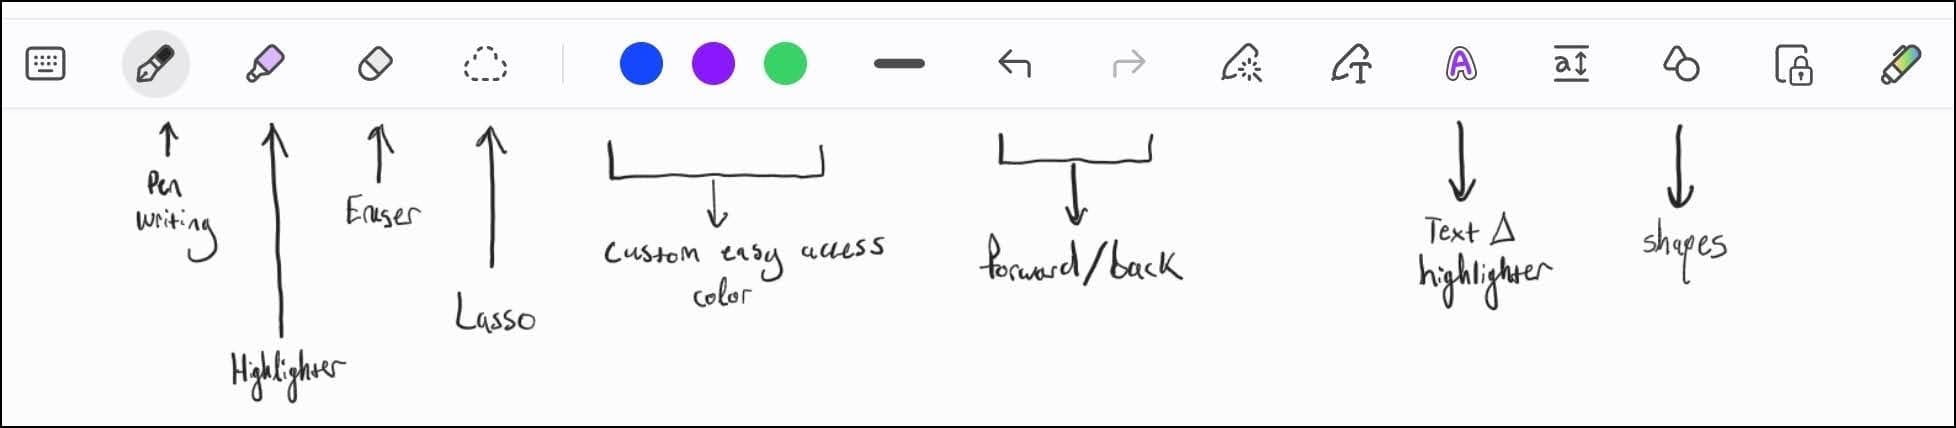
Very sleek & minimalist toolbar integration
The toolbar on Samsung notes is simple on the outside, yet super customizable on the inside. There are custom color palettes you can choose from, super easy and fine-tuned pen size switching, the same is also true for the highlighter. I don’t typically use the eraser feature because erasing is built into the pen: all you do is click and hold a button and erase. As shown below, there are 3 primary colors you can list for easy access. The lasso feature is also incredibly useful, and easy to use. I use it all the time to move around my writing. Lastly, one of my favourite features is the text-change highlighter. This allows you to quickly change the color or thickness of previously written text. I use it all the time to change the color of key words.
Writing + erasing flow
The writing experience is flawless, especially with the Samsung Pen. The little eraser button on the Samsung pen makes erasing feel non-interruptive. Plus, the soft tip and spring makes writing feel super flowy.
Copy & pasting textbook diagrams with ease
Reading pdf textbooks on Samsung notes is also great. I tend to go in split screen, with a tab showing a textbook on the left, then a notes tab on the right. Using the Samsung pen I can take quick screenshots of diagrams and charts then easily paste them into my notes.
Exporting notes into high-quality & well sectioned pdfs
I’ve had very little issue exporting pdfs of notes or assignments from Samsung notes. I can also save/share specific note pages from each document. With other apps, such as onenote, my text always gets distorted, pages shifted, and it can be an overall nightmare.
Note-Taking System
The Template
Starting off, I have a default note-taking page. It’s a simple pdf I made, consisting of one line on a blank page.
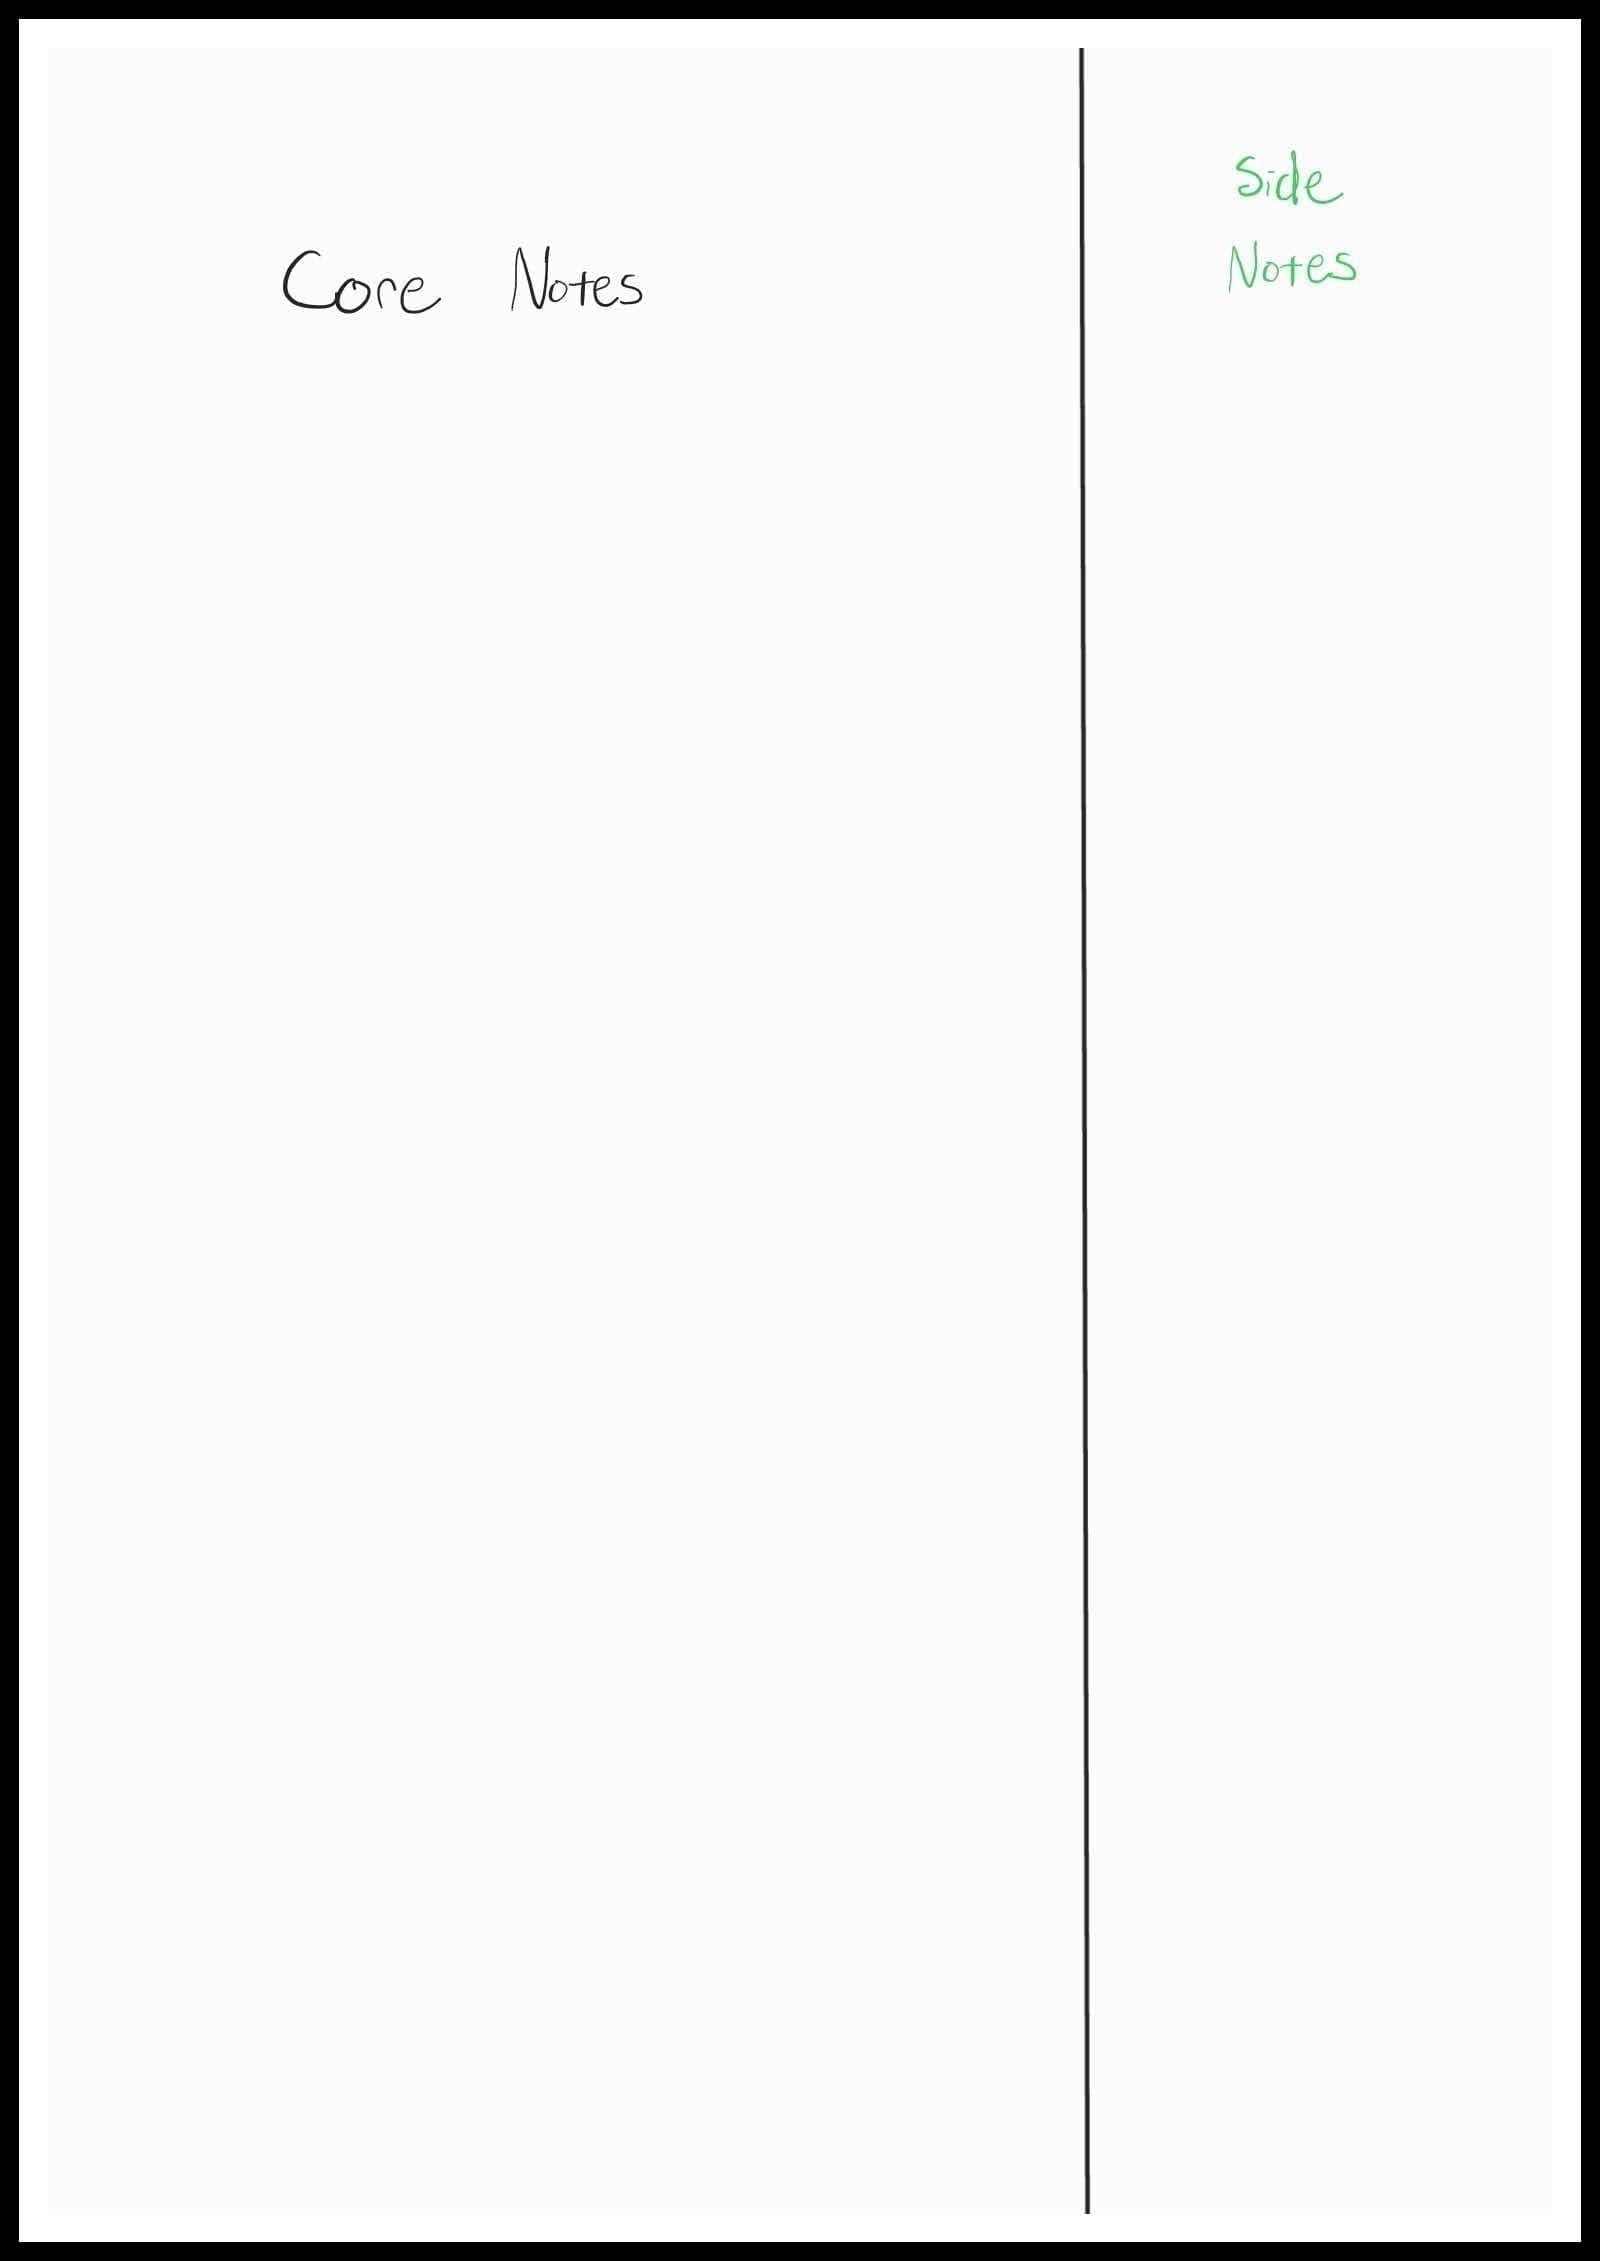
The large section to the left is for my core notes, and the side-section to the right is for “asides”, or less important notes, comments, distracting ideas, or for problem solving.
I’ve found this to be a fantastic template. I’ve imbedded a link to the pdf template… just in-case you’re bad at drawing straight lines.
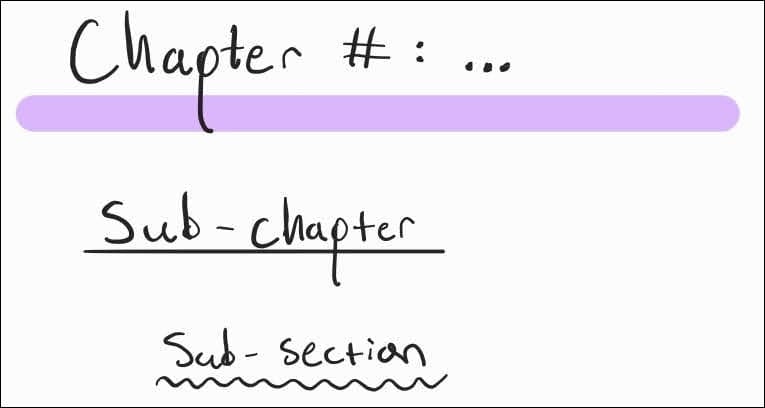
Titles & Sectioning
I like to title sections in 3 layers of depth. The first is Chapters, which I underline with a purple highlighter. Then indented underneath are Sub-chapters that I underline with a black line. Lastly, indented further, are Sub-sections, underlined with a black squiggle.
Bullet Point Hierarchy
This one is fun. I’ve always danced around with the ordering of bullet point shapes and indentation. After a couple years of indecisively switching them around this is what I settled on.
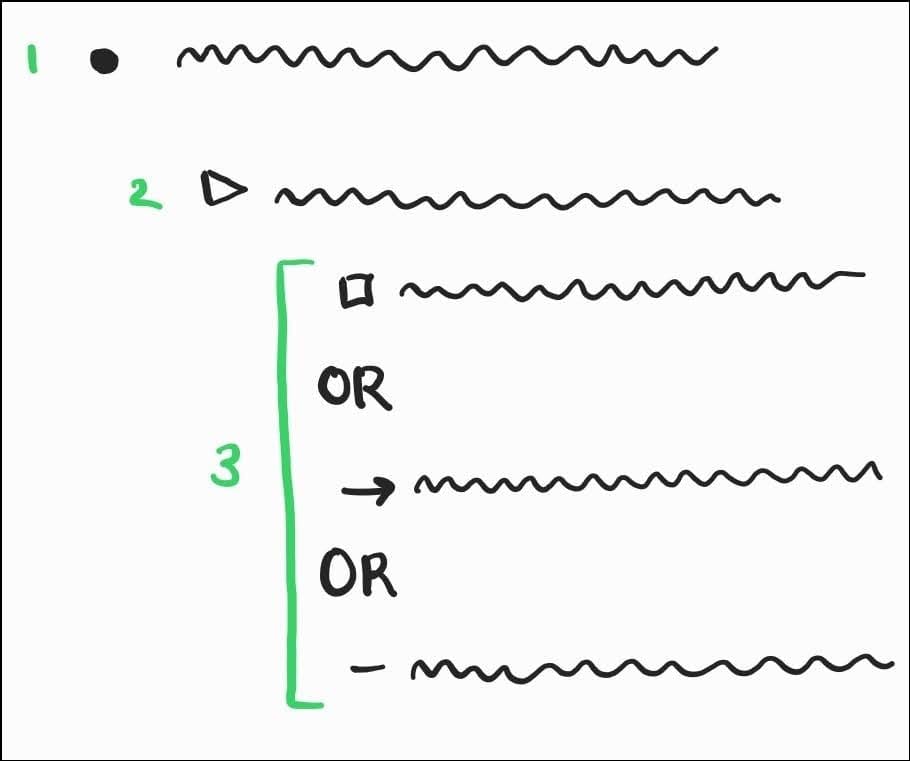
The hierarchy:
Bullet Point → Triangle Toggle → Box OR arrow OR dash
Where sometimes I alternate between the box, arrow and dash. Or I’ll order them further to get a 3rd, 4th, and 5th indent.
Color Coordination
Okay, this one is my favourite. I believe color coordination to be the greatest contributor to making appealing notes, following some decent handwriting.
This is my system:
- Black: For all my core notes
- Purple: For key words, equations, and any proofs
- There are many key words I originally write in black then highlight to purple with the text-change highlighter
- Green: For any side comments, or extra details that are add-ons, or observations of the main content.
- Dark Blue: I use blue strictly for writing out the solutions to any example/practice problems
- Red: I use red to mark sections I don’t understand and want to look further into. All questions I feel need asking are written in red, usually in the sidebar.
- Orange: I only use orange for writing down key insights from professors or online teachers for a specific topic in my notes. I also convert questions written in red to orange, using the text change highlighter, once I’ve figured/written out an answer.
- Light Blue: I use a neon light blue to write noteworthy distracting thoughts & ideas I’m having while note-taking. These all go in the sidebar as well.
Borrowing Diagrams
Some people feel like they have to draw entire graphs, or diagrams, whenever they come across important visuals in a textbook. I see that as a waste of time. I don’t think you get much benefit from simply copying it down. Especially graphs showing trends between variables. Rather, I just snip a screenshot of the textbook diagram on my tablet, then copy and paste it into my notes. My notes are littered with textbook diagrams. What I find awesome is that I can easily annotate and draw on these diagrams. I save so much time borrowing graphs in this way rather than re-creating them.
Examples:
Here as some example notes that display these systems in action.
Electrodynamics
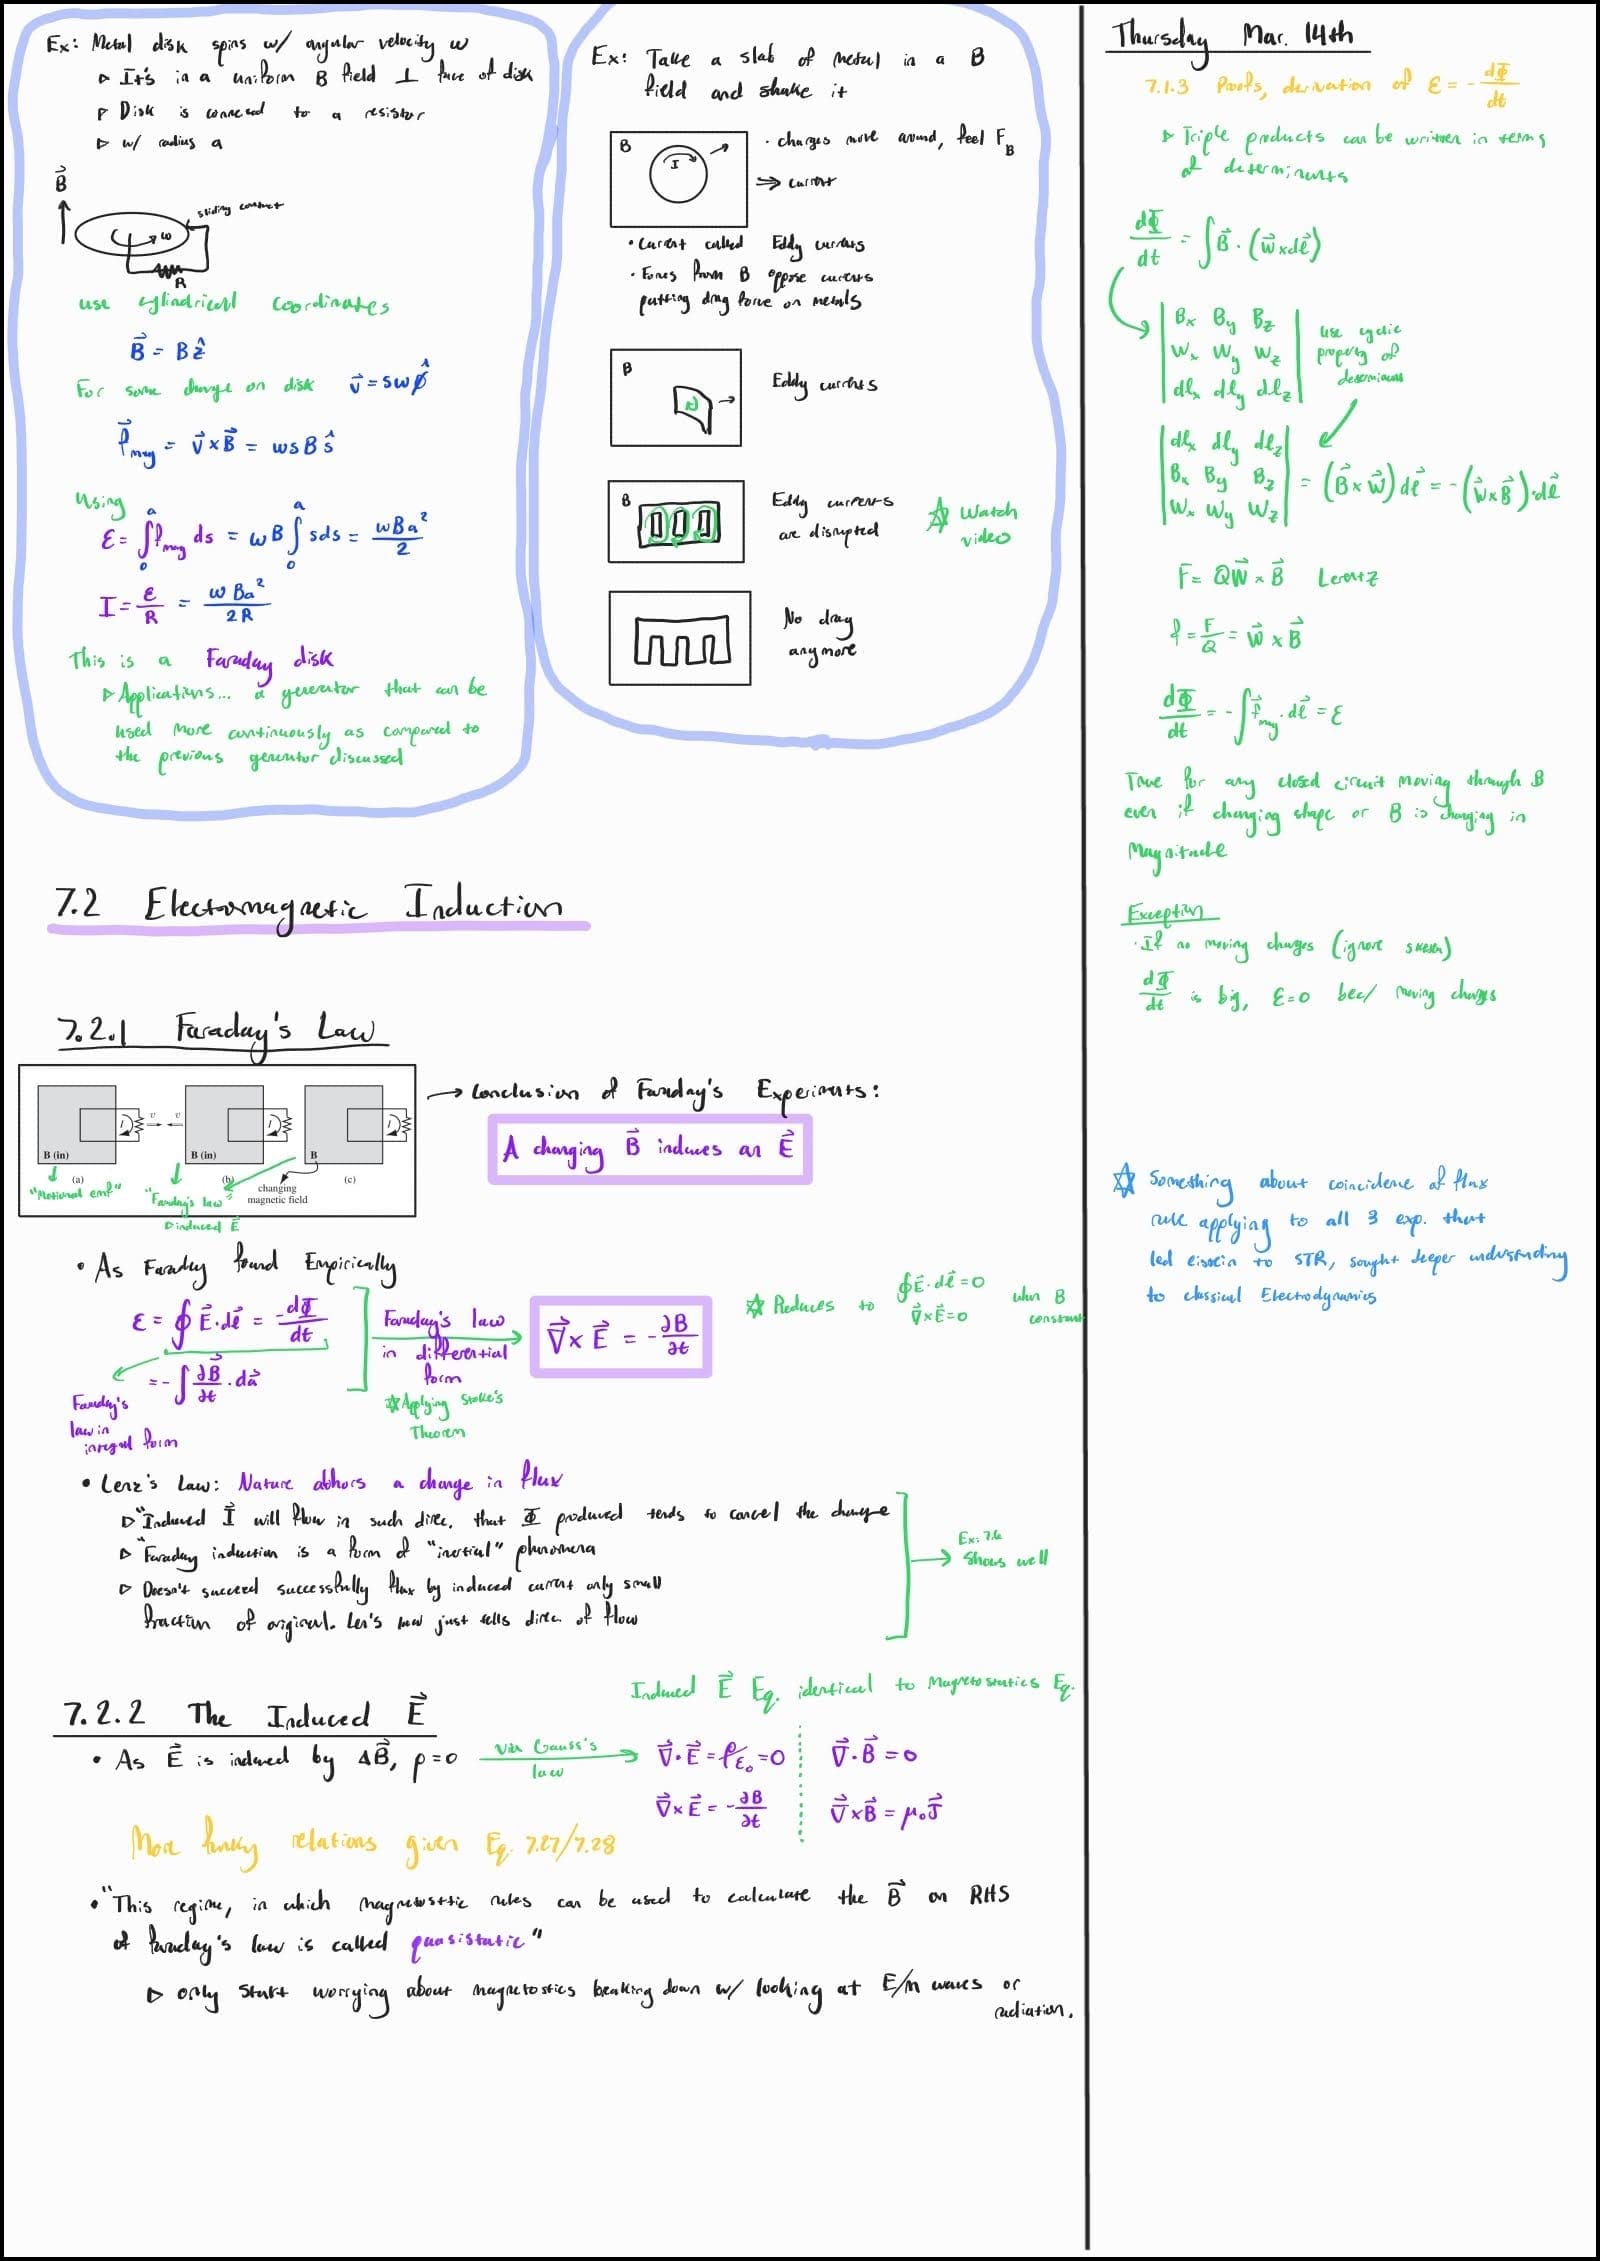
These are some notes from my second year electrodynamics course. In the main section to the left I have some example problems at the top, then textbook content notes further down. All my core notes made-up of words are written in black. Any proofs are written in purple, and key equations, theorems, or definitions are boxed with purple highlighter. Any extra connections or descriptions are given in green. In the side bar I also have some extra class notes written in green, with the date given at the top. I then have a quick little side-comment to myself that I put in light blue. Also notice how in the example problems the question and details are written in black, all solutions in dark blue, and all solution comments in green.
*The diagram and content in the notes above are from Introduction to Electrodynamics by Griffiths
Mathematical Physics

This one is also good for showing how I’ll write side notes that build upon my main notes. As seen in the sidebar, I decided to dive deeper into some necessary definitions. I also wrote out some questions in red, then a further comment from class about an example in yellow.
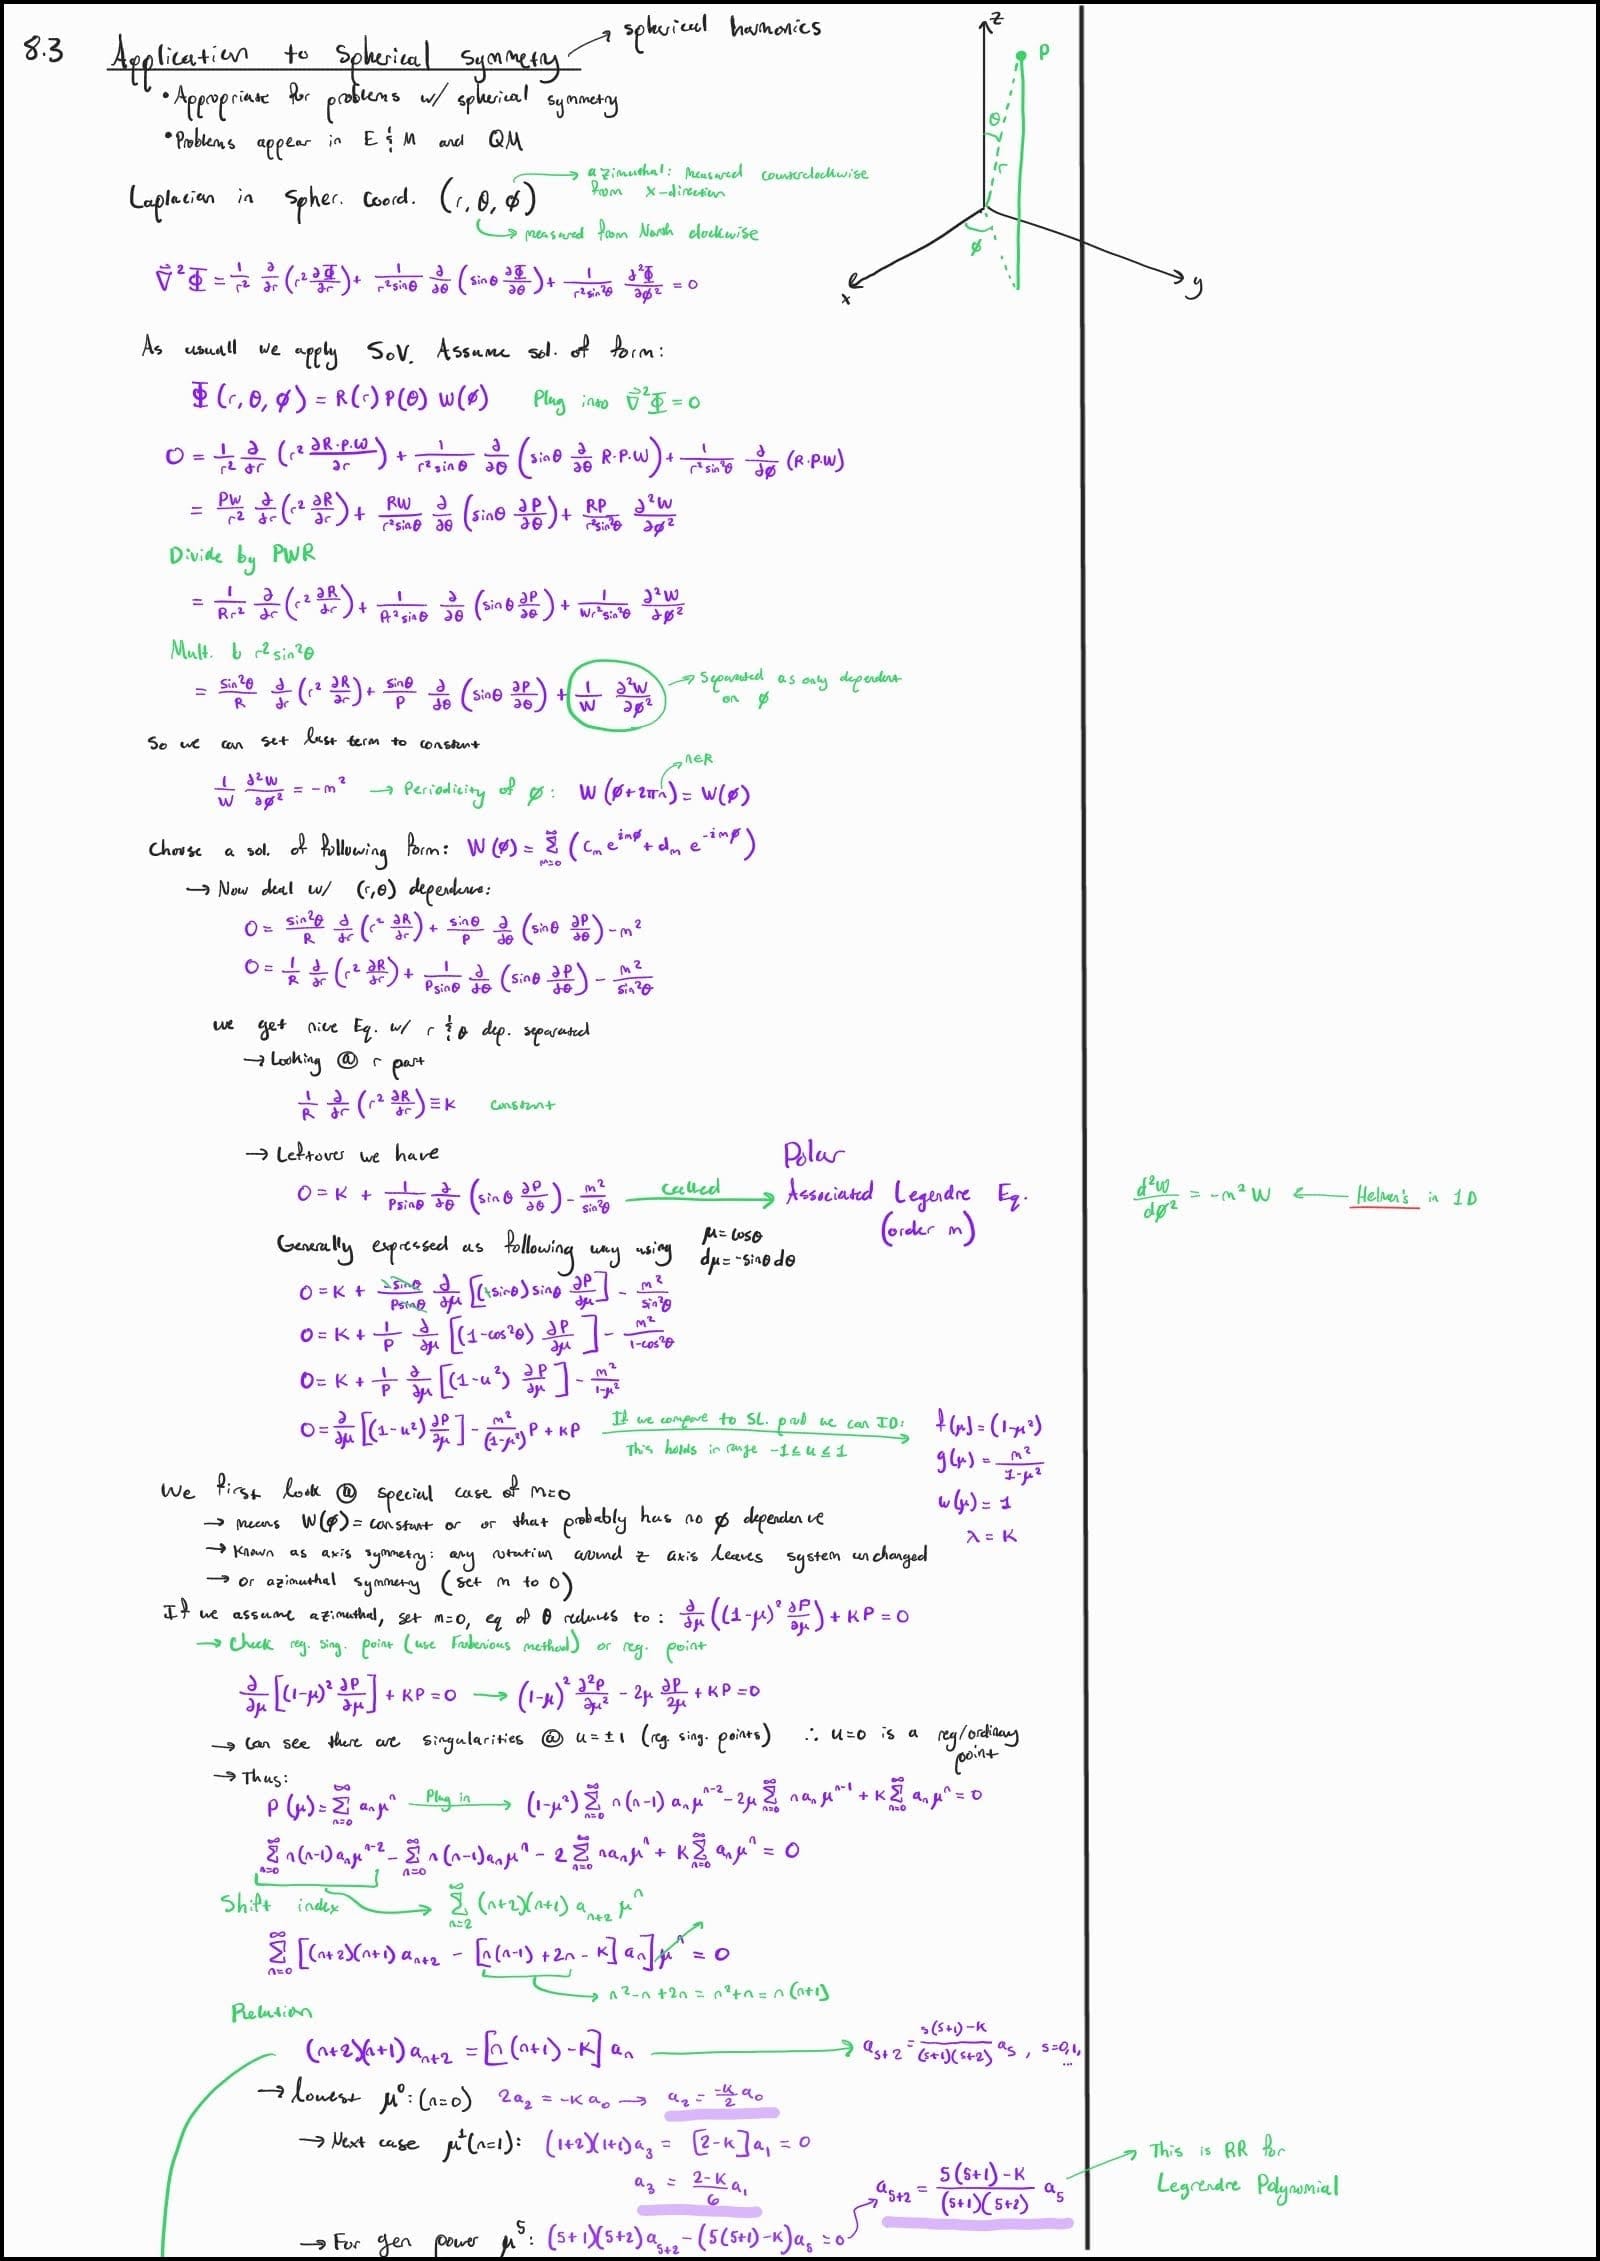
This one’s great for showing how I structure notes mainly consisting of proofs. Most of the main points are in black, with derivations in purple, and any side-comments + arrows in green.
Chemistry
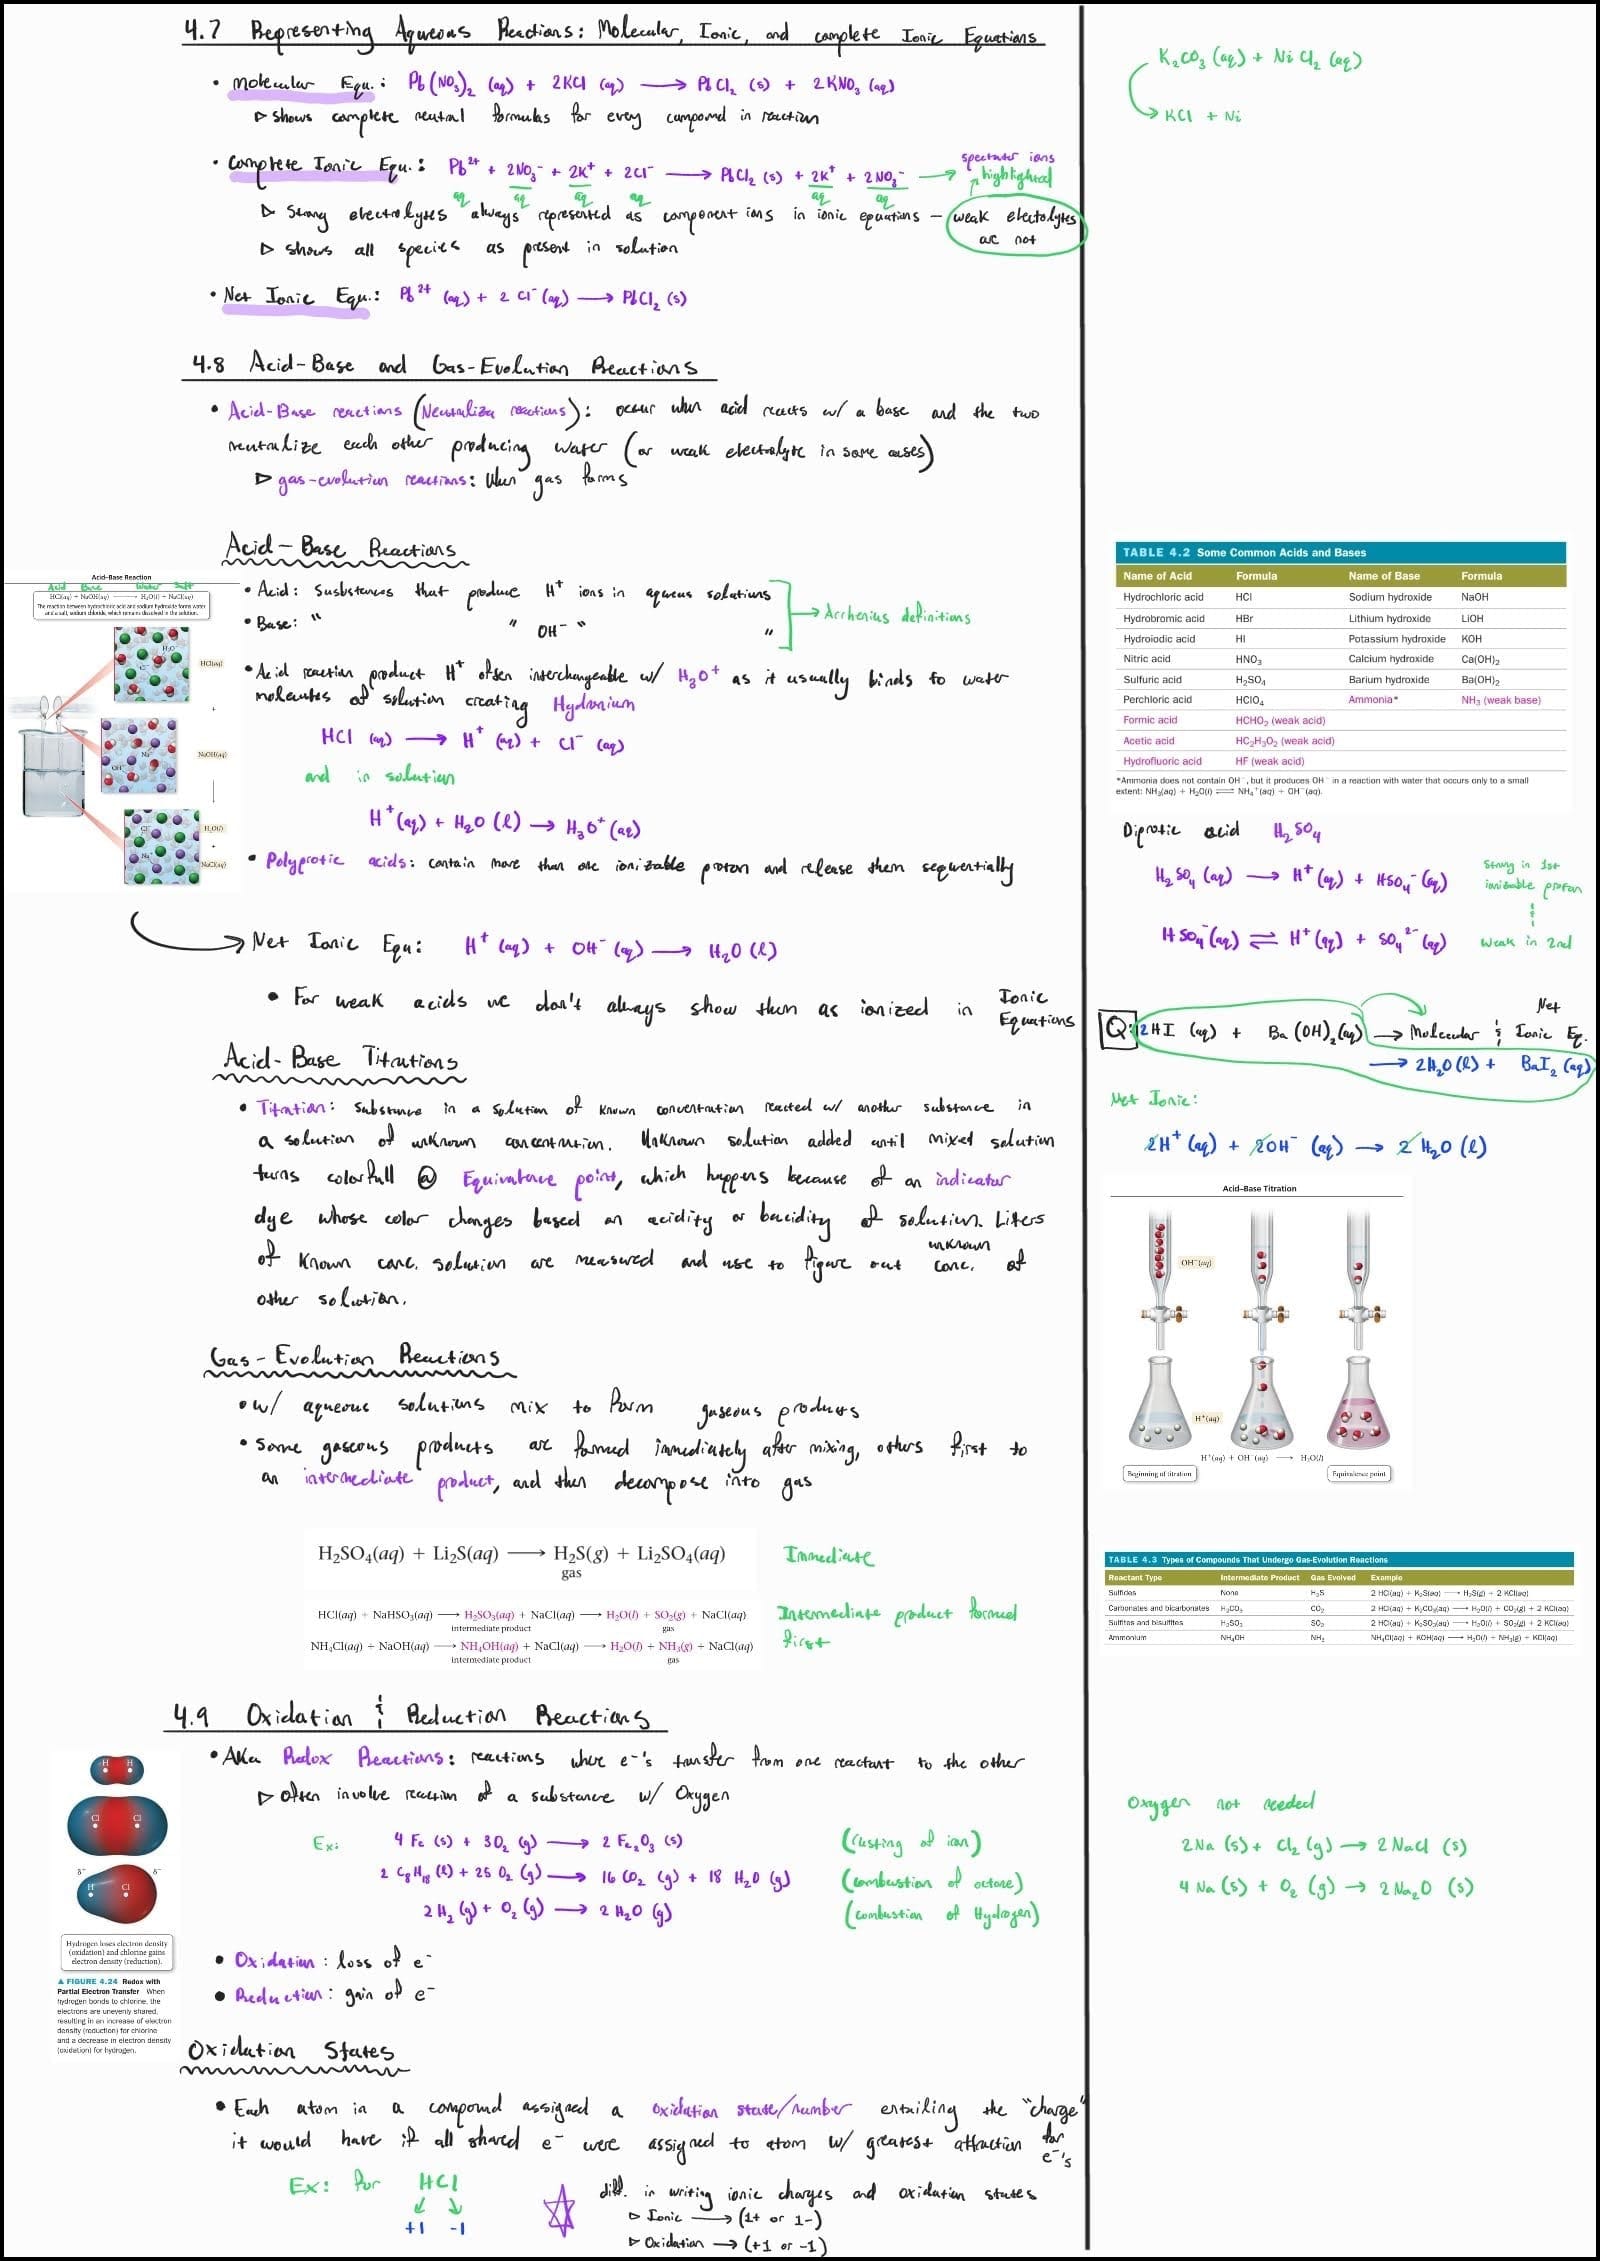
These notes are good at showing how I include relevant diagrams from textbooks or the internet. In subjects like Physics and Biology I tend to draw a bit more on the diagrams. Sometimes I include too many diagrams because I think they look cool, which I did when learning multivariable calculus.
This page is also good at showing titling/sectioning, the use of purple for key words & equations, how I include extras in the sidebar, and overall organized formatting.
*All diagrams and content in the notes above are taken from Chemistry A Molecular Approach by Nevaldo Tro.
Class vs. Textbook Notes
The format of my class-notes greatly varies depending on the subject I’m studying. For physics I tend to read and create core notes from the textbook. Then anything that seems important from class will be added to the sidebar of my textbook notes: even if I haven’t written textbook notes for that section yet. Unfortunately, there are some classes fairly disconnected from a decent textbook. In those cases I made do with class-notes only, which I did for: Astronomy, Optics, Mathematical Physics, and Modern Physics II.
The same applies here for chemistry. I like relying on a textbook for the core content, and will add any key points or extra explanations from profs or online resources in the sidebar.
For math courses, I rely more heavily on textbooks and online resources than any other subject. If it’s a good textbook I’ll take semi-thorough notes on proofs. If not, I first read through the textbook or online resource to get a general understanding of the topic, problems, and solutions. Then I’ll do some of my own practice. Finally, I’ll take outlined notes for different problems, their problem solving steps, and key equations. I basically take math notes in reverse order to other subjects.
For Biology and Earth Science courses, I mainly annotate my professor’s slides, then create 5-10 page condensed notes when reviewing for exams.
How to know what’s important?
In class, professors will usually point out what content is important. Obviously, you should pay attention to that and make note. But, this is a bit trickier when taking textbook notes. Textbook reading is definitely a skill. I find you have to develop a specific reading bandwidth to be able to decipher what’s truly important. Rather than trying to take notes every paragraph or quarter page, especially for dense content such as physics, I find it best to try reading close to a full page at a time. Then identify what’s the core point. There are many analogies and examples that authors use to further define the main idea for those who are struggling to grasp the concept. But your notes shouldn’t reflect these circling analogies. You should sit there and digest it, then do your best to write it out in the clearest, most concise manner possible. Much easier said than done. I sometimes create notes that meander with the author way more than I should. But that’s apart of the process, you only get better at filtering with time. And don’t even get me started on proofs, that’s a deep dark rabbit hole, where venturing requires very careful navigation… especially for the hyper-curious. Curiosity kills the cat around proofs, for you will venture into the dark dimensions of mathematical reasoning way above your pay-grade.
It took me a while to figure out my own note-taking system and rhythm. I figured I’d share it, just in-case it helps somebody else tidy up their note-taking routine. I’m thinking of doing a future series on how I study for the different STEM subjects. So if you’re curious, stay in-tune for that.
I hope you enjoyed the article. I’m super interested in how other people take notes, so comment your secrets down below if you so dare. As always, if you found something particularly interesting, or feel like I left something out, comment that good stuff as well. Constructive criticism is always welcome :).
Commenting requires you to subscribe to this webpage. It’s free, so don’t be shy. If you prefer not getting email notifications, click “unsubscribe” in your email inbox.